Solving Rubik's Cube for Speed
Introduction & The Basic Idea
This is a tutorial for my method of solving Rubik's Cube. It is intended both for beginners and experienced cubers. There is no group theory or written notation involved, I just show you how to move. You need a modern canvas tag capable browser, ideally with WebGL enabled.
Using this method, I won the 1981 Swedish championships, and finished 4th in the first world championships in Budapest 1982. I also won a minor world championship in 2005. As my official results show, I am a has-been these days.
Please take a look at my terminology, so you know the difference between a turn and a twist, for example.
If you are a total beginner, look at this description of the basic Rubik's Cube concepts.
The Basic Idea
Most people solve the cube layer by layer. This is a simple way for the human mind to approach the problem, but it is useless for speed cubing. No matter how good you are, you will use more than 100 moves. Going for speed, I use 55–60 moves on average. Going for few moves, I average 40–45.
Sample solution
- Turn 1–5 is Step 1
- Turn 6–12 is Step 2
- Turn 12–16 is Step 3
- Turn 17–29 is Step 4
- Step 5 was not needed
- Turn 30–41 is Steps 6–7 (F4)
The 7 Steps
- Step 1 — Build a 2×2×2 corner
- Step 2 — Expand to 2×2×3
- Step 3 — Twist the edges
- Step 4 — Finish 2 layers
- Step 5 — Position the corners
- Step 6 — Twist the corners
- Step 7 — Position the edges
Steps 1, 2 & 4 also have block building tricks, and there are 13 example solutions to practise on. I also have some tips on the physical and mental aspects of speed cubing.
Last Layer Algorithm DB
I made a web app database of all 43 million 17 move or less last layer algorithms. It's called Birdflu.
There is also a German translation of the tutorial by Frederik Meysel, from 2005. The site keeps a change log blog.
Basic Cube Facts for True Beginners
You need to understand what the parts of the cube are. It is not 54 stickers. And it is not 27 little cubes. It is 12 edge and 8 corner pieces moving inside a frame of the 6 unmovable centre pieces. Each edge has two stickers, and each corner has three stickers. Here's how the pieces look separated.
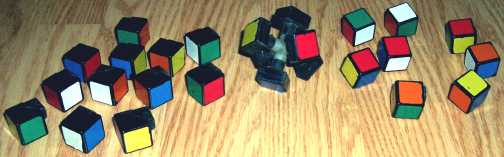
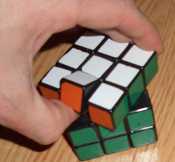
You can take apart your cube yourself and see how it works. Prying loose an edge like in the photo to the right works on most cubes. The first time you may have to use a bit of force, even using a knife for leverage.
But some modern speed cubes have a different mechanism. For those you twist the edge 90° instead.
The common error by people who don't know how the cube is built is to try to move individual stickers, instead of pieces. They think that they have accomplished something when they "complete one side" as above. This is a quite useless position, since almost none of the pieces are in the right position. That they happen to have a white sticker by the white centre is just a pretty accident, and does not mean you're anywhere near a solution.
This misunderstanding is probably the main reason people find the cube so very hard. Make sure you understand this!
You also have to realise that the centre pieces do not move. No matter how much you turn, they always remain in place. This is obvious when you look at the centre piece of a dismantled cube.
Terminology and Conventions
As far as I know, there is no universally accepted terminology for cubing, and even if there is, few people know it. So confusion is common and rampant. For this tutorial we will use the following exact conventions.
| Term | Meaning |
|---|---|
| Corner | A physical plastic corner piece. Has 3 stickers. |
| Edge | A physical plastic edge piece. Has 2 stickers. |
| Piece | A corner or an edge. |
| Sticker | A coloured sticker. Those that are nine on each side. You know what I mean. I used to call them "facelet" on the site 1996–2006. I can't explain why. |
| Side | One of the 6 sides of the cube. |
| Layer | The cube consists of three layers (top/middle/bottom). This is a 3-dimensional concept, as opposed to "side" which is 2-dimensional. The "green layer" is the one with the green centre, regardless of how many green stickers are on it otherwise. |
| Twist, twisted | How a piece is oriented. A corner can be twisted in 3 different ways, an edge in 2. |
| Turn, turning | The physical act of rotating a side. |
| Position (noun) | A place in the cube, relative to the centres. The red-white position is the edge position between the red and white centres. Positions don't move, pieces move by occupying different positions. For example the red-white edge can be in any of the 12 edge positions, and it can be in the correct (red-white) position but wrongly twisted. |
| Position (verb) | To put a piece in its correct position. |
| Cube position | An, uh…, position of the whole cube. Its entire state. |
| Move sequence | A useful sequence of turns. |
I have given names to those move sequences (Niklas, Sune and Allan) that you need to learn by heart. It becomes impossible to talk about them otherwise. There is no particular logic to the names, I just picked them for fun. I believe that is my privilege as inventor of the method.
STEP 1 Build the 2×2×2 Corner
The goal in this step is to build a 2×2×2 block. Or more precisely, to place one corner and its three neighbouring edges in their correct positions, solving 4 out of the 20 cube pieces.
Beginner
For the beginner it is often easiest to pick a corner that you will always start with. This makes it easy to find the pieces you need. We will use the blue-yellow-orange corner. This means that the three edges are the blue-orange, the orange-yellow, and the blue-yellow.
First find the 4 pieces you need, and then try to build the 2×2×2. It's not really hard, but it can take a while if you're a rookie. It's best to try yourself for a while, to get a feel for it, but if it still doesn't work out, look at the description below.
There are many special cases, but this is the basic way I solve it. Remember, we're trying to join up 1 corner, 3 edges and 3 centres.
- Pair up the corner with an edge.
- Pair up another edge with a centre.
- Join the pairs from 1 & 2 to make a 2×2×1 block.
- Join the remaining edge with the 2 remaining centres.
- Put it all together in the final move.
This animation shows a concrete example:
- Pair corner with blue-orange edge. [Turn 1]
- Pair up orange-yellow edge with orange centre. [Turn 2]
- Join. [Turn 3–4]
- Blue-yellow edge fitted between blue and yellow centre. [Turn 5–7]
- All done! [Turn 8]
Intermediate
After you can easily do one corner, you should start looking at all 8 corners and choosing to start with the one that is fastest to solve. Normally, one or two are real easy (and some are hard). Picking the easy one makes quite a difference. It can be a difficult transition to use different colours all the time, but it is worth it. After a while you'll be completely used to it.
At competitions, there is normally a 15 second period where you get to look at the cube before timing starts. This is what you do during that time (though 2–5 seconds are usually enough).
Advanced
Try to be aware of where the four pieces are at all times. You should be able to visualise the full step solution in your mind before starting.
Spend a lot of time looking at this step, and you will start seeing 5 moves ahead or more surprisingly often.
Here are my solutions for 4 random cube positions. When you can choose between 8 corners you should get 1–2 fewer moves on average.
For more advanced techniques, check out the block building section.
STEP 2 Expand to 2×2×3
After step 1, we have a solved part of the cube, and we have three sides that we can move freely, without breaking what we have accomplished. Not bad!
In step 2 we expand what we have to a 2×2×3 block. That is, we add one corner and two edges to the solved block, going from 4 to 7 solved pieces of 20.
Beginner
Choose one of the three possible corners to expand to. We will use the green-yellow-orange corner, and of course the yellow-green and green-orange edges.
This is quite similar to how you work in step 1, join the corner with one of the edges and work from there. When you're familiar with step 1 you should have no problem.
But be sure not to break up the 2×2×2 block! You need to be aware where it is at all times. Otherwise it's back to step 1…
Intermediate
You have three corners to choose from. It's important to pick the easiest, just like in step 1.
The hardest positions are when a piece is in its right position, but twisted the wrong way. The easiest way to deal with that is to just pick another corner to solve!
Advanced
These simple and very useful moves took me months to figure out (actually I didn't, someone I taught showed me…), since it involves breaking the holy 2×2×2 block. As an exercise, try to find how to do the third example cube above in 7 moves instead of 9 by breaking the 2×2×2.
It's not easy, so here is a hint (click to reveal)
First move: turn green layer ¼ clockwise. Second move breaks the 2×2×2.Sometimes, the first move of step 3 will be the opposite of the last move in this phase. So with some foresight you can skip both. Also, while doing the last turn of step 2, you can often stop halfway, and fix a pair of bad edges midway. See the examples for several examples of this.
For more advanced techniques, check out the block building section.
STEP 3 Twist the Edges
The basic idea of the method is to solve the entire cube from here by just turning the 2 free sides. But if you try to do that, you soon discover that some edges are always twisted the wrong way. We call those the "bad" edges. We need to fix that before we move on. Step 3 is this fix.
Step 3 can seem incomprehensible before you "get" it, but it is really the simplest step in the method.
Beginner
If you don't like the beginner instructions, take a look at the intermediate ones. You may like that approach more.
Basically, we need to do 2 things in step 3.
1. Identify the bad edges. There are 7 edges not part of the 2×2×3. Pick any one of them, say the red/blue one. Using only the 2 free layers (that is, not breaking up the 2×2×3), place it between the red and blue centre pieces. If it's twisted right, it's good. Otherwise it's bad. That's all. Make a (mental or on paper) note of it, and check the next edge. When checking the second and later edges, do not try to keep the previous edges in place. It is not only extremely difficult, but also completely unnecessary. Once you know if an edge is good or bad, you know.
2. Turn bad edges into good edges. There are always an even number of bad edges. You can make them good in pairs. The simplest way is the 3 move sequence shown below. Just place two bad edges in the positions of the coloured edges, and do it. Check that your edges actually became good the first times, to be sure you're doing it right.
Continue until you're sure all edges are good.
Intermediate — the 4 rules
Since we only want to know if an edge would be correctly twisted if it was placed in its correct location, we don't have to waste moves actually moving it there.
It is easy to see which edges are bad without moving them. Let's call the colours of the two remaining centres A and B (red and white in the illustrations). Ignore everything except the stickers on the (unsolved) edges with colour A or B. There are the four simple rules to remember:
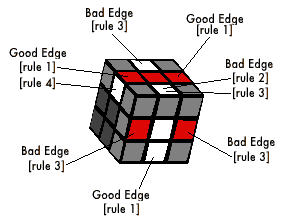
| Rule | Condition | Status |
|---|---|---|
| 1 | An edge with an A colour sticker next to the A colour centre | GOOD |
| 2 | An edge with an A colour sticker away from the A colour centre | BAD |
| 3 | An edge with a B colour sticker next to the A colour centre | BAD |
| 4 | An edge with a B colour sticker away from the A colour centre | GOOD |
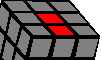
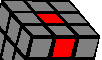
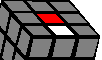
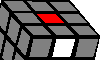
The usual advice applies in step 3 as well: Look ahead, and try to make a good beginning for the next step.
Advanced
Why does the move sequence in the animation above work? It's not just a "magic move". You can understand it. What happens is [1] one bad edge is flipped when moved to the other layer, [2] another bad edge replaces it, and is [3] (un)flipped when the first turn is reversed. Both edges get flipped in the process and so become good. Once you understand that, you can figure out several other moves that do the same thing.
I find that way of thinking much easier than just learning all cases by heart. However you want to learn them, every possible case is given the fastest solution below: 2 bad edges · 4 bad edges · 6 bad edges.
All positions: 2 bad edges
All positions: 4 bad edges
All positions: 6 bad edges
STEP 4 Finish 2 Layers
Back to adding solved pieces! In step 4 we go from 7 to 12 solved pieces out of 20.
This is clearly the hardest step. Not that it's all that hard. You could also say that the other steps are really easy!
Beginner
What you do in step 4 is pretty much the same thing that you do in step 1 and 2. But here you have one hand tied behind your back. You have only two sides you can turn, and halfway through the step you can't even do many of those moves, since they would destroy what you already built in the step.
From the piece perspective, the goal of step 4 is to add 2 corners and 3 edges to the 2×2×3 block, to make it into a 2×3×3 block (2 full layers).
You have a choice of two ways to expand, either leaving the red or the white layer for last. In the examples we will leave red, expanding with the white-green-orange and white-blue-orange corners and the white-blue, white-green and white-orange edges.
It's best for the beginner to think of this step as two separate steps, 4a and 4b.
Step 4a
First focus on getting one corner and its two adjacent edges in position. The same techniques you use in step 1 and 2 can be used, but since you can only turn two sides, more manoeuvring is needed. To do what you want, you first have to move the pieces in a position where the desired turns can be made on the two free sides.
Make sure to only turn the two unsolved sides! It can be easy to get lost and start turning other sides. Keep a firm grip around the 2×2×3 with one hand.
Note that you now have two completed 2×2×3 blocks! Remember which of them you started with. If you accidentally start using the other, bad edges will reappear, and you have to go back to Step 3. A firm grip of the 2×2×3 is at its most important now! You can also use tape to make it temporarily unmovable.
Step 4b
Putting the final 2 pieces in place without breaking anything is almost claustrophobic (there are a few other options, explained below). Since you can't break up the 2×2×1 block you made in 4a, you have no choices in how to move the white layer. You must wiggle it back and forth, ¼ turn each time. So your only degree of freedom is to choose one of three possible turns with the red layer every other turn!
The normal way of doing this is to join the two pieces in the upper layer, and then put the pair in place, as in these examples (which are the continuations of the examples above).
A good thing about step 4 is that the (sometimes many) turns can be done blindingly fast, since we only turn two sides, and never need to change grip.
Intermediate
If you can place the final corner by itself, that is often good.
There are easy ways to place the final edge, by very briefly breaking up our previous achievements. For the mirrored positions, almost identical sequences apply. Note that the second one is a variation of Allan™ from step 7!
Advanced
The worst positions are when the last corner and edge are next to each other, but misaligned (first cube above). You can untangle the pieces and put them back together using only the "beginner" moves. But it is often faster to use a Sune™. A reverse Sune™ fixes the case when the corner is twisted the other way.
Check out the examples for a description of the "broken corner" position, which is pretty common and good to know.
As an exercise, try to find how to do the middle of the three example cubes above in 6 + 4 moves instead of 10 + 12. The solution is the second cube above, but it's more fun to try to figure it out yourself.
A few less obvious 4b tricks
Below are a few less than obvious 4b tricks. The Step 4b tricks index has many more!
Step 4b Tricks — Full Index
I had been doing step 4b for 20 years, but never systematically gone through every possible position. I knew I sometimes wasn't sure what to do, but I could always invent something pretty quick and move on. In the summer of 2001, when I had a few well deserved months of vacation/unemployment, I finally started doing the full research project. Jan 1 2003 it was finished, and I made this page.
After going through this methodically, I found better solutions for a third or so of the positions, and also became much more consistent in picking the fastest solution, instead of just one of several possibilities that happened to pop into my head. It's lowered my average with 1–2 moves. And now I pass the savings on to you!
Some of the more complex ones were discovered using Ron van Bruchem's cube solver applet at speedcubing.com. It was quite a shock when it did my 20 year old 12 turn solutions in 7 turns!
a — Both pieces in top layer, not adjacent
First the easy ones. Both pieces are in the top layer, and not adjacent.
b — Corner placed, three edge positions
With the corner placed, we have these three positions.
c — Pieces adjacent (harder)
The harder ones are when your two pieces are next to each other (and don't match up). The only easy way is to first detangle them, and then do one of the easy moves. But there are better ways. These are the top layer ones.
d — Edge already in place
With the edge already in place a funny thing happens. The edges are good as seen from both 2×2×3s. So you can and should use the other one when useful. Seen that way there are only 3 positions.
STEP 5 Position the Corners
Now we're at the final layer. Here we do not think as much. We recognise patterns and apply rules.
When starting this step, you should have only one layer remain unsolved, and the edges in it already correctly twisted ("forming a cross"). In this step we will place the top corners correctly, nothing else. That means the red/blue/white corner should be between the red, blue and white centres, but its red sticker does not have to be facing the red centre. The corners normally look pretty unsolved after completing step 5, you have to inspect them to know they're right.
To do this we need a tool that moves the top corners without twisting the top edges. This tool is Niklas™, and you can see it below.
In the example, don't worry about how the corners get twisted, just note that the two white corners swap position. (Turn 8 is just to align the corners to the centres to show clearly how the corners move. Niklas is a 7 turn sequence.)
Beginner
These are the odds:
- 1/6 of the time, the corners will already be correct. You can go to step 6.
- 1/6 of the time, two corners diagonally opposed will have switched positions.
- 4/6 of the time, two adjacent corners will have switched positions.
First we need to find which two corners (if any) that have switched positions. That's easy. Just turn the top layer until two corners are in correct positions. The two others are either correct or need swapping. There are only four positions to check.
Niklas™ will swap the two corners opposite the layer where you make its first move. For the diagonal case, two Niklas™es are needed. You can start with any Niklas™, and that will give you the adjacent case.
You can do this by just looking at the top layer corners, but I find it much easier to turn it so the colours match up with the rest of the cube. You waste a move but gain time.
Intermediate
The fast way to check corners that I use is to find two adjacent corners with the same (non top) colour, and move them to the side of that colour. If the corners are correct, all 4 will be in place. If adjacent corners are switched, two will be correct, and you can see which ones. If diagonal corners are switched, all four corners will be placed wrong.
Example: Start with the red/blue/white one. Red is the top colour, so only blue and white are interesting. Start with blue. Check if any of the adjacent corners have a blue sticker. If so move those corners to the blue side. If not, do the same for white.
Here is a useful move sequence that directly switches two corners diagonally. It is a different (and as good) way of doing Eve.
Note that Niklas™ twists the corners in the same way as Sune™ does, so the same "target" rules apply. A Niklas™ that hits a target starts with the same turn as a Sune™ that hits the same target. About half the time you can avoid one Sune™ this way.
Advanced
For the advanced cuber, the steps 5–7 meld together to one single step of dozens or even hundreds of special cases. To achieve real speed, you need to be able to remember them in a fraction of a second. Below are a few examples. For what to do for each of the 25 different corner cases, check out the complete Step 5+6 index.
STEP 6 Twist the Corners
Beginner
So far we have the top edges twisted right, and the top corners placed right. The next step is twisting the corners right. This can be done using only the one simple move sequence below. I call it Sune™. It twists three of the four top corners. It also moves top edges, but we don't care about that yet.
The two animations show both "mirrored" versions of Sune™. As you can see they're the same moves, just "mirrored". You need both. Note the big X. That is the target sticker of the Sune™ (explained below).
Step 6 can always be done with 2 Sunes or less. You do need to learn Sune™ to use this method.
To talk about how to use it we have to define the target of a Sune™. In words, the target of a Sune™ is the corner sticker on the opposite side from the first turn, on the side of the corner moving up. But it's easier to see from the examples. Just look for where the black X's are in relation to the first move. The pattern is easy to see.
The rules (assuming a red top layer)
Once you understand targets, you only have these simple rules to keep in mind.
Rule 0: With no correct corners, target one of the four red stickers. After the Sune™, there will be one correct corner. Use Rule 1 to solve it.
Rule 1: With one correct corner, target as shown in the beginner section. This solves the corners and completes step 6!
Rule 2: With two correct corners, target one of the two non-red stickers of a twisted corner. After the Sune™, there will be one correct corner. Use Rule 1 to solve it.
Rule 3: Three correct corners is impossible.
Rule 4: Four correct corners is already solved.
Intermediate
First below: doing Sune™ backwards (AntiSune) twists corners the same way as Sune™, but moves the edges differently. Note the target! You can hit a target with either a Sune™ or an AntiSune, and often you can skip step 7 by choosing right.
The middle sequence is a double Sune™, and the last is a Bruno™, and they're simple and fast for those corner looks.
Advanced
You can get under 20 seconds with just what's in this step. Mostly by quick recognition and execution, both of which are in general more important than learning lots of sequences. Having said that, it does help a lot to learn more move sequences to avoid Step 7 more often.
There are only 49 possible positions in Step 6. Here are solutions to every single one, mostly using combinations of Sune™ and a few other sequences.
STEP 7 Position the Edges
Only 12 possible positions remain. 1 of them is the solved case. Here is how to solve the 11 others:
Beginner
8 of the 12 have this position with three permuted edges (or its mirror image). You have to learn the first solution below (and its mirror image). For historical reasons, it is called Allan™.
If you get one of the other positions, you can just do Allan™, and you will be in a "single Allan™" position.
(An Allan™ can actually be done using only 2 Sune™, as seen in the second cube, if you really don't want to learn many move sequences).
Intermediate
There are only 2 other possible cases. Bert™ (first below) happens 2/12 of the time, Arne™ (second), 1/12.
Learn them by heart. And learn to do them fast. You will always need them!
Advanced — alternative solutions
Here are some alternative solutions, that may fit your style better.
2003 World Champion Dan Knights favors the last solution for Bert™. It's a little less straightforward, but can be done in just 4 movements. He explains how with a video here.
I think of the first alternative Arne solution as a 'brute force' one. The second is more of a 'finesse' solution. And the third (Thanks to Doug Li) can be done without shifting your grip. All can probably be done faster by many, despite using more turns, depending on your twisting style.
The other thing you can do is to plan ahead and learn many special top layer cases in the earlier steps, so you can avoid this step much more often than 1 time out of 12.
The advanced cubist will instinctively mix up the cube when this step has been completed, thereby forcing himself to start again at step 1.
Block Building Patterns
The core of this method is to build blocks. It is what steps 1, 2 and 4 are all about. This can be done intuitively, but with experience you will pick up some patterns you can immediately recognise, which is one of the keys to doing this fast.
Here are some of my favourite patterns. I hope they can be of help. I'll add some more when I think of good ones.
"Simple join"
This is trivial in a way, but I don't want to overlook it since it is really the one I use the most. It's the second thing I start looking for on a mixed cube, if there are no already formed pairs. And it is the basis for a lot of my block building — if I have nothing better to do, I start doing or preparing simple joins, and that makes things happen. It simply consists of finding a corner and edge that are one move away from forming a pair.
"Double join"
Also very basic and very useful. It doesn't "just happen" as much as a simple join, but it's the most common second goal once you've formed a pair. Since we're building a 2×2×1 block a centre needs to be part of it, as well as the corner and 2 edges.
"Swing"
Brilliant when you can get it. That's pretty often for S1, and occasionally in S2. If you want to think of it that way, the first move is just a setup move for a double join in the second move. Both the lone edge and the pair can be in other positions, as in example 2.
"Double swing"
This is a very good Step 1 start, and it sometimes happens in Step 2 as well. Again, this is a two move setup for a double join, but while it's good to be aware of that, I think you have to recognise it on its own. While it is fairly rare in this pure form, you can quite often get there with one or two setup moves (see below).
Since it's symmetric, you can do it in two ways, as shown. But if the edges are switched, things look very similar, but you have a fairly awkward 6 move solution instead.
Two of many examples of similar positions or setups. There's a lot of positions that are very close, and it's hard to recognise them all.
"Roundabout"
This is almost only useful as a start of Step 1. If there is no corner/edge pair already formed, there is usually one of these available to form one in 3 moves. There are always ways with fewer moves as well, but these are very easy to spot.
While useful in themselves, they get really interesting if you can "pick up" one of the other edges on the way (examples 2 & 3). In those cases, since you're building a 2×2×1 block, the centre needs to be in the right place as well. If you allow one setup move (examples 4 & 5), it's a fairly common start.
"Parallel roundabout"
This one is not very common, but it is very cool, so it gets its own entry.
In Step 4, the roundabout becomes the fairly tortured sequence in the first cube. Sometimes I have no better ideas, and do it just to make something happen. But occasionally you'll get the situation in the second cube, which is in fact two roundabout situations at the same time, and the same sequence solves both. Hehe!!
"Broken corner"
One of my favourites in Step 4, but it can of course occur earlier also.
This is just something you learn to recognise. But in the position after the first move, you should be able to "smell" that the next move sets up the corner for two simple joins that add up to a double join. Once you're good at block building, that is — no hurry!
The second cube is the same idea with a half move as second move.
"Pillar"
This Step 4 trick is fairly common, and very easy to spot. This is again a setup for a double join.
Step 5+6 Final Layer Index
This is a complete index of all possible corner positions in step 5, and some good ways to solve them. It does not deal with edge issues at all, so after this you are left with step 7. Since Step 5 is about positioning the corners, this index only deals with positions where the corners need to be swapped. If the corners are correctly placed, see the Step 6 position index.
The Math
I've based this on the 7 possible ways the corners can "look". The top colour stickers of the corners can form 7 different patterns, which I've named A–G. It's easy to see fast, and is what I look for when I get here. The next thing to look for is positions of the corners.
There are 27 different ways that the corners can be arranged. Corners 1, 2 & 3 can show the top colour three different ways, while the 4th is determined by the other three. 3×3×3 = 27. For each of those, there are 6 different ways the corners can be placed to show that pattern. So in total we have 27×6 = 162 different corner configurations. In theory.
Of those 6 corner placements, 1 is that they are correctly placed, 1 is that two corners are swapped diagonally, and 4 are that adjacent corners are swapped. I've taken to name them like this:
- Correct already: A, B, …
- Adjacent swap: Ax, Bx, By, Bz, …
- Diagonal swap: AA, BB, …
Due to symmetries etc, the 162 positions are really just 32 distinct ones.
- Correct: 7 of 27 (A 1, B 8, C 4, D 4, E 4, F 2, G 4)
- Adjacent: 18 of 108 (Ax 4, Bx 8, By 8, Bz 8, Bq 8, Cx 8, Cy 4, Cz 4, Dx 8, Dy 4, Dz 4, Ex 8, Ey 8, Fx 4, Fy 4, Gx 8, Gy 4, Gz 4)
- Diagonal: 7 of 27 (AA 1, BB 8, CC 4, DD 4, EE 4, FF 2, GG 4)
For example, 8 of 162 is 4.94% of the cases.
How much should I learn?
First of all, there is nothing wrong with learning a lot of final layer sequences, but you should understand that it is not the only or even the most important way to get fast. It's just a way to use fewer moves. Getting fast is mostly a mix of two things: using fewer moves, and making faster moves.
For few moves, learning to do Step 1–4 in few moves is the most important. Aim for 30 moves when going slow and thinking about every move, and don't expect to get to 30 very fast. Step 5–7 improvements is what this page is about, and you can cut that down from 30 to 15–20 if you memorize a lot of these sequences.
For faster moves, the two important parts are physical finger speed and lookahead. The trap here is to get fixated with just doing moves incredibly fast, but failing at lookahead. If you do 7 moves in a second and then have to spend 3 seconds finding where to do your next move, you're not really going fast. Better to do 3 moves per second but always know what your next move is.
I just say this since I think a lot of people get caught up in learning sequences instead of doing other more important stuff that I can't really make a page for. That said, if you like to learn all this anyway, go ahead.
OK, but which cases should I learn??
Of my two indexes, Step 5+6 is more important to know than Step 6+7. So start here.
Apart from Niklas, Sune etc from the main tutorial, I've named 8 sequences for use in the index. Most of my solutions are combinations of these ~15 sequences. If you learn anything, learn those. Clix, Evelyn and Eve are probably the most important.
 By — Buffy
 Bz — AntiBuffy
 BB — Bob
 Cx — Clix
 Cz — Czeslaw
 Dz — Denzel
 Ey — Evelyn
 EE — Eve
Really Advanced Stuff
I've been working on a full Step 5+6+7 Index, with a new approach. It's still a bit crude, but I think it's already the best way to do the final layer, if you want to spend a lot of effort being really fast.
A lot of the sequences are taken from Bernard Helmstetter's computer runs. This just scratches the surface of what is on his site.
The corner groups
 A — Ax, AA
 B — Bx, By, Bz, Bq, BB
 C — Cx, Cy, Cz, CC
 D — Dx, Dy, Dz, DD
 E — Ex, Ey, EE
 F — Fx, Fy, FF
 G — Gx, Gy, Gz, GG
Groups: A · B · C · D · E · F · G
Step 5+6 — Group A
This corner configuration occurs 1 time out of 27.
Combinations
 4/162
 4/162
Perfect sequences
4/1624/162Step 5+6 — Group B
This corner configuration occurs 8 times out of 27.
Combinations
 8/1628/1628/162
 8/1628/162
Perfect sequence
8/162Step 5+6 — Group C
This corner configuration occurs 4 times out of 27.
Combinations
8/162 4/1624/162
 4/162
Perfect sequences
4/1624/162Step 5+6 — Group D
This corner configuration occurs 4 times out of 27.
Combinations
 8/162
 4/1624/162
 4/162
Perfect sequences
8/1624/1624/162Step 5+6 — Group E
This corner configuration occurs 4 times out of 27.
Combinations
 8/1628/1624/162
Perfect sequences
8/1624/162Step 5+6 — Group F
This corner configuration occurs 2 times out of 27.
Combinations
 4/162
 4/162
 2/162
Perfect sequences
4/1622/162Step 5+6 — Group G
This corner configuration occurs 4 times out of 27.
Combinations
 8/162
 4/162
 4/162
 4/162
Perfect sequences
8/1624/1624/162Step 6+7 Final Layer Index
This is a complete index of all 50 possible positions in step 6, and how to best solve them. In step 6 all corners are in the right position but (probably) twisted wrong, and all edges twisted right but (probably) in the wrong position.
There are 27 possible corner configurations. For each there are 12 possible edge configurations. So in total 27×12 = 324 different positions. Fortunately many of them are really the same position, just mirrored or rotated. It turns out there are only 50 distinct positions. One of them is the solved position, and 2 (C1 and D1) are really the same position.
For all positions I give a simple solution that almost only consists of the four first sequences seen below (Sune, AntiSune, Rune, Bruno), and the step 7 sequences. That is pretty much the ones I use for speed cubing. They use an average of 14.1 moves and at most 20. For about half of the positions there are better known solutions, shown under Perfect sequences (shaded). That's a whole lot more to memorize, but you get down to 12.9 moves on average, or 17 at most. There are better sequences for a few of them, but this is pretty close to the optimal set of solutions. All the better sequences are produced by Bernard Helmstetter, using a program he has written. He has a lot more solutions on his site. The "Benny" move seen below in B9, and its inverse, are very useful.
These solutions ignore the top layer's position relative to the rest of the cube. So 3 times out of 4 there will be an extra turn needed. So you might want to add 0.75 moves to the move counts here to get really correct numbers.
The positions are organized by corner configuration. There are 7 different. I have arbitrarily named them A–G, and drawn pictures of them, each linking to its group below.
Of my two indexes, Step 5+6 is more important to know than Step 6+7. So start there.
The corner groups
- A — All corners correct. Step 7. Only edges left to fix.
- B — One correct corner. A single Sune can fix the corners. It can take a lot of turns anyway.
- C — Two adjacent correct corners, the others "sideways".
- D — Two adjacent correct corners, the others "on top".
- E — Two diagonal correct corners.
- F — Four incorrect corners "on toe". Land of the Double Sune.
- G — Four incorrect corners "on heels". Let Bruno guide you.
Groups: A · B · C · D · E · F · G
Step 6+7 — Group A
This corner configuration occurs 1 time out of 27.
 1/128%
 1/128%
 2/1217%
 8/1267%
Step 6+7 — Group B
This corner configuration occurs 8 times out of 27.
Combinations
1/128%1/128%1/128% 1/128%
 1/128%
 1/128%
 1/128%
 1/128%1/128%
 1/128%
 1/128%
 1/128%
Perfect sequences
1/128%1/128%1/128%1/128%1/128%1/128%1/128%1/128%Step 6+7 — Group C
This corner configuration occurs 4 times out of 27.
Combinations
1/128%1/128%2/1217%2/1217%2/1217%2/1217%2/1217%Perfect sequences
1/128%2/1217%Step 6+7 — Group D
This corner configuration occurs 4 times out of 27.
Combinations
1/128%1/128%2/1217%2/1217%2/1217%2/1217%2/1217%Perfect sequences
1/1217%2/1217%2/1217%Step 6+7 — Group E
This corner configuration occurs 4 times out of 27.
Combinations
1/128%1/128%1/128%1/128%2/1217%2/1217%2/1217%2/1217%Perfect sequences
1/128%2/1217%2/1217%Step 6+7 — Group F
This corner configuration occurs 2 times out of 27.
Combinations
1/128%1/128%2/1217%4/1233%4/1233%Perfect sequences
1/128%2/1217%Step 6+7 — Group G
This corner configuration occurs 4 times out of 27.
Combinations
1/128%1/128%2/1217%2/1217%2/1217%2/1217%2/1217%Perfect sequences
1/128%2/1217%2/1217%2/1217%13 Annotated Solutions
I hope this will provide the kind of understanding that disjointed theory steps can not. Like how I actually think when solving, what the considerations are, how much I can and can't see ahead, etc. The positions are random ones taken from the Sunday competition for the Yahoo Speed Cubing club on Nov 25 2001. This is of course not speed solutions. Each took me several minutes, and I think hard and study the cube very carefully for each turn. What I did not do was to try out several different options to see which one would lead to the best solution in the end. It's all based on what I can see and think ahead about when looking at a position. Sometimes I did check what alternatives would have resulted in afterwards, as you can see.
You can follow this fairly well by looking at the animations. I recommend stepping one turn at the time, and turning the cube around a lot (click and drag on the cube) to see where the pieces are. But the best way is to get the same position on your own cube, and go through the solutions there. You can do that by stepping backwards from the solved position, but I prefer taking the cube apart and putting it back together in the right state.
A few observations from doing this page:
- In the final turn of S2, I always check if I can flip a bad edge before or during it. About half the time I do. This is something I learned while going for few moves, but it's even more useful for speed cubing, since you can see and act on it immediately. You can see this in examples 4, 5, 6, 7, 8, 10 and 12.
- One position that comes up a few times is the one below. Let's call it "Broken corner". It's very useful in S4, but also in S1 and S2. It's well worth memorizing. It's in examples 2 and 4.
- Surprisingly, for 7 of the 13, I solve S1+S2 in one go, instead of doing S1 and S2 separately. For most of them I didn't do that because it looked so good, but because the S1 situation looked so bad. Still the S1+2 solutions averaged 9.2 moves vs 11.5 for the normal cases, even though they started out from a worse position. Maybe that's coincidence. But I doubt it. When speeding I don't do nearly as much S1+2 starts. They're often far too complicated to plan out in 15 seconds.
Acronyms etc:
- T1–7 = Turn 1–7
- YB edge = Yellow-Blue edge
- BWO corner = Blue-White-Orange corner
- RY/B pair = Red-Yellow edge and Red-Yellow-Blue corner
- [P13/3] = The perfect solution is 13 turns, and would save 3 turns. I don't use it since I don't know it.
- T17 = When I merge the final turn(s) of one step with the first in the next, I indicate that with blue turn counters. I hope it's not too confusing that some steps never seem to get completed. They are complete in my head!
Example 1
- T1–7. S1. Several 7 turn corners available. I could easily start with another.
- T8–10. S2. The BWO corner is the obvious choice, but BYR is also excellent.
- T11–15. S3. 4 bad edges. It's tempting to try to preserve the RY/B and/or OG/Y pairs, but it's rarely worth it. I just go straight for the bad edges.
- T16–24. S4. A simple S4 with no real choices except in T21, where you can pick either of 2 options. The other leads to a 44 move solution the way I usually do it.
- T25 makes it easier to see the corners. [P13/3]
- T26–33 S5+6 is a fundamental move to solve S5–6 for this corner config
- T33–41 S7 Arne (A2)
Example 2
- T1–4. S1. The existing BW/O pair makes this the obvious start.
- T5–10. S2. The BYO corner is a little easier than the other two
- T11–15. S3. There are 2 ways to fix these bad edges in 5 moves. They look equally good to me. I pick one on random.
- T16–29. S4. Nothing too obvious here, so I go for the GOW "broken corner".
- T30 makes it easier to see the corners.
- T31–40 S6+7. (no S5) Bruno (G4)
Example 3
- T1–8. S1+2 The RY/B pair gives an obvious starting point. Luckily, that also forms the OY/B pair, and with some unusual moves I can fix both S1 and S2 simultaneously. If you pick a half turn instead of the quarter turn in T6, you get the beautiful solution in the second cube (uses perfect B4), but that's hardly possible to see then.
- T9–13. S3. With both the BW/R and OW/R pairs already formed, you'd think there was some clever way to do S3 and S4 in one sweep, but I can't figure one out. So I just fix the edges without breaking the pairs.
- T14–20. S4. It's too hard to preserve both blue pairs. I just do the simple one, luckily, the other falls right into place.
- T21–27 S5–6. is solved with a Niklas. The perfect FL solution is 12 moves, 4–5 moves faster.
- T28 colour adjustment.
- T29–37 S7. Allan (A4)
Example 4
- T1–9. S1+2 There are two good pairs to start from. I pick the GO/W, since the first turn also forms the GR/W pair. Some original thinking lets us do both S1 & S2 at once.
- T9–15 S3. 2 bad edges left after.
- T16–26. S4 GRY is a "broken corner".
- T27 colour adjustment.
- T28–34 S5. A Niklas does S5 and sets up the corners in Sune position. Niklas twists corners like Sune, so the "target" rules from S6 apply.
- T35–41 S7. I end with a Sune (B5) [P11/3]
Example 5
- T1–5. S1. Despite WO/G being done, it needs 7 moves. YOB is the only decent corner to start with.
- T6–12. S2. All 3 corners suck. BWO looks a little more fun.
- T12–20 S3. There are 4 equally good ways to do T17. One day I might show all four here.
- T21–31 S4. All the other corners look downright hostile, so I start with the RYB one (OK, OYG has some promise too). T25 is key! Forming RW/B midway is unusual, but works great here.
- T31–40 S7. (No S5 or S6) Allan (A4). A great ending of a problematic solve. Bypassing S5 & S6 is just luck. I'm not that good!
Example 6
- T1–9. S1+2. The GO/Y pair is "stuck", so I start for the GOW corner instead, while preserving the pair. With some very careful manoeuvring in T4&T5 it all falls in place very nicely.
- T9–14. S3. I pick a half turn in T10 to preserve the RW/G pair
- T15–27 S4. GRW is the obvious corner for S4a. I make sure to split up the malformed GR/Y pair while building GRW. For T24 I can pick one of two turns, and do the one that gives a better corner configuration.
- T28–34 S5+6. Niklas
- T35–43 S7. Allan (A4)
Example 7
- T1–12. S1+2. Only bad corners here. The WO/B pair is awkwardly placed. The best I can come up with is to do the YOB corner, while preserving the WO/B pair, and try to keep things together. 12 moves is good for such a bad start.
- T12–19. S3. 6 bad edges needs 7 moves. The third move you can go two ways, but I can't say which one is better.
- T20–33 S4. One of the 4 corners is slightly less bad than the other 3. In T20 I choose the move that separates the misformed BR/Y pair. In T30 I can go two ways. They look equally good (the other also ends in 52, but I didn't know that)
- T34–41 S5+6. This handy move solves this corner configuration for S5+6.
- T41–52 S7. Bert (A3).
Example 8
- T1–7. S1. This one was painful! The GW/R pair looks great, but can't be completed in under 8 moves. The others don't look any better. The best I can find is this 7 mover for OYG
- T8–10. S2. I kept an eye at WOG during S1, and made sure it was in good position. T5 was key.
- T10–12 S3. Only 2 bad edges.
- T13–24 S4. YBO is the obvious choice for S4a. Very standard S4b move.
- T25–31 S5. Maybe my least favourite corner config. There's a 13 turn S5+6 sequence that I don't know... So I do a Niklas.
- T32–41 S6+7. A lucky Bruno (G4). These can go much worse.
Example 9
- T1–6. S1+2. GO/Y looks like the perfect start, but if you look more you see that you can build GR/Y first, while keeping the GO/Y pair intact, and do S1+2 as fast as you could do just S1 with GO/Y.
- T7–12. S3. In T10 I can go two ways, this one is best for the RGW corner
- T13–23 S4. Both RGW and BOY look good. RGW is 2 moves shorter.
- T23–32 S5+6. One of the 2 diagonal corner swaps I know.
- T32–40 S7. Arne (A2)
Example 10
- T1–7. S1. One of several 7 move options.
- T8–14 S2. One of several mediocre options.
- T14–18 S3. The only way.
- T19–23 S4a. RGW looks slightly better than the others
- T20 Quarter turn instead of half turn to break up the problematic RB/W pair.
- T28 Half turn instead of quarter turn gives better final layer position
- T24–31 S4b. Simple standard move that uses many turns.
- T32–39 S5+6. My standard move for this corner position.
- T39–51 S7. Bert (A3)
Example 11
- T1–10. S1+2. It's clear that RWG and OWG are the corners to go for. How to get there quickest is trickier. There may be a shorter solution.
- T11–18 S3. 3 moves longer than needed to preserve the 2 pairs. It seems worth it.
- T19–25 S4. The pairs work. I primarily build on the RWB trio, but the RY/G pair gets nicely built up using the same moves.
- T26–36 S5+6+7. Well known Niklas plus Sune (B5) case. 7 + 7 = 11 when the sequences melt together. [P10/1].
Example 12
- T1–7. S1. BRY is one of several 7 move solutions.
- T8–13 S2. BRW is the least bad alternative.
- T13–20 S3. I have to work for it here too.
- T21–31 S4. GRY looks best.
- T32–45 S6+7. No S5. G3. [P12/2]
Example 13
- T1–10. S1+2. A few 6 turn corners. I picked one at random. Midway I decided to do S1+S2. T5–6 sets up S2 in mid S1.
- T11–15 S3. Textbook S3.
- T16–28 S4. No easy pickings. I do the easiest corner the hard way.
- T29 Colour adjustment
- T30–40 S5+6. My standard move for this corner position. [P13/6] (131).
- T40–48 S7. Allan (A4)
The Final Layer as 270 Special Cases with Alg Combos
Here is what I believe could be the ultimate way of speed solving the final layer with oriented edges. You can get there through the Petrus method, or other means.
Background
Counting symmetries but not inversions as the same case there are in total 270 different positions for this case. The perfect solutions for all these are well known, thanks to Bernhard Helmstetter, and average 12.08 moves.
Why not the "perfect method"?
It is tempting to assume that the best way to speed solve this would be to learn all these algorithms. But I seriously doubt it, because…
- Memorizing 270 sequences is an enormous task.
- Learning them so well that you can do them at full speed cubing speed, is a much bigger undertaking. And one that never stops — to keep this speed you have to practice all these algs more or less daily.
- Those algorithms are optimal for number of moves, not for finger friendliness.
- Opportunity cost. Even if this can all be done, you have to spend so much time and effort on it, that you will have to spend that much less time on other aspects of speed cubing.
Why not the usual fast method?
Traditionally, last layer methods are done in 2 or more steps, where each step is independent of the other. After each algorithm you have to check the new position to determine what algorithm from the next step to apply to it. Each such check is called a "look", so the best of these methods are known as "two look" systems. The "perfect method" described above would be this idea taken to its extreme as a "one look" system.
The most successful such system is the Friedrich 2 look system, as described here. The first "look" (OLL) orients all pieces, and requires memorization of 57 algs. The second (PLL) places all pieces, using 21 algs. The average length of each step is around 10 moves [anyone know the exact numbers?], resulting in a total move count of around 20 for this approach.
The Combo system: one look, two algorithms, "perfect enough"
Think of this as taking the best and most practical aspects of the two systems rejected above. It is a one look system, that requires learning a few dozen algorithms (of your choice), and averages 14–15 moves.
The idea is to learn only a reasonably small number of algorithms — certainly less than the 78 needed for Friedrich, and for each of the 270 distinct positions, memorize the fastest combination of two of those algs. Or to be precise, if you have 40 base algs, you will only need a combo for 230 positions.
Learning all those is still a fairly big memorization undertaking, but much smaller than memorizing 270 individual algorithms. My gut feeling number is that it's 10% of the effort. And for "muscle memory", you only need to keep 40 known fast algs up to speed, which is much easier than 270.
I think that the 2–3 more moves used compared to the perfect 12.08 is more than compensated by these factors in terms of execution speed.
Doing it in practice
I made a web site (birdflu.lar5.com) where you can easily build your own 270 "combo" method from your favorite algs. You can also make sets for all 1200+ positions with edges not oriented.
I have made the alg set I use as a starting point.
- The base algs I use are here.
- Browse all positions with it here.
- Create your own combo alg set here.
The 270 positions and their combos live in Birdflu, Lars's web app, rather than on this page, so those links need it to be online.
How to Get Really Fast — the Physical Side
Though the mental side may be the most interesting, there is also a strong physical side to speed cubing. You need a good cube and fast fingers, to have any chance of achieving world class speed!
The cube itself
These days it's hard to find a bad cube. A cube you find at a regular retailer is most likely a good speed cube.
Springs in the "skeleton" are vital to quality cubing. You can sense if there is one by pulling on a layer. It should have a "springy" give of 1 millimetre or so. New cubes can be tight and hard to pull apart, but it's still a different feel than a springless cube. Do NOT buy a springless cube! Modern cubes are mostly built so you can't get to the springs and adjust them, which is a shame. The exception are the DIY cubes you can order from rubiks.com and other places. Not that it's a must have at all, but you can get slightly better results by adjusting the spring tensions, and even replacing broken springs.
Though some cubes can get pretty good without treatment, I recommend that you lube it. Many lubricants work. I used candle wax first. It works fine, except that it needs to be reapplied twice a week. Later I turned to silicone spray, which works for months. It is what all speed cubers use these days. You can get it cheaply at any automotive store.
One weird thing with the silicone spray is that when you first apply it, on some cubes, it will act almost like glue, and will be very hard to turn for about a minute or two, and only after that will it be easy to turn.
In the 1981 Swedish championships, the cubes were silicone treated, but not "broken in", so we only got about half our normal speed. I won with 40.43 sec…
The cubes I can find now (made by Oddzon (buy here)) are good and fast mechanically, but have horrid paper stickers (under a thin plastic membrane) that wear out in no time. Some people paint them when the stickers are gone. I use regular coloured vinyl film. It works fine, once you've found 6 colours of film. And you get enough vinyl for a 1000 cubes :-) These days you can even order high quality replacement stickers from cubesmith.com.
Even the best cube will wear out. That is natural, just buy a new one. I have used up over 15 cubes over the years.
Dexterity
I don't know the best way to use hands and fingers, but I know what I do. My style is probably adapted to my method, where you spend a lot of time turning the same two adjacent sides.
I'm right handed, but I use the left hand for turning, and the right hand for more or less just holding the cube. I don't know why. It took me several months before I realized I was doing this "left handed".
The grip
I have tried to illustrate my right hand grip in this cube. The red sticker is where I hold the thumb, orange (rotate to see better) for the index finger, and yellow is the middle finger. The white part is the two sides you can turn.
Use a firm but not too tight grip.
Think in "columns"
The sequence of two turns to the right can be done in one single movement by gripping the orange "column" by your left hand by the X marked stickers. The right hand holds a grip like above.
Every sequence of two (often more) moves can be done with column moves, that halves the number of movements you need to make. It takes a while to get to see sequences as moving columns instead of separate turns, but it's very easy once you "get" it.
The Trigger
To do this, hold with your left hand the thumb on the red spot and the middle finger on the yellow. The index finger should not be part of the grip, but should press gently on the orange sticker during the first turn.
When it is about 3/4 complete, you can turn the top layer with the index finger. Do the second turn that way. Meanwhile, start gently turning back with the rest of the left hand, still holding the grip between red and yellow. When the second turn is 3/4 done, you will be able to do the third turn instantly.
This can be done ridiculously fast, 0.1 seconds or so. But start practicing slower…
You need a cube in good shape, or you will break it or get stuck.
Movies
Enough talk. Here is actual footage of how it's done. (The original page embedded these as QuickTime movies; they are linked here as files on lar5.com.)
- Fast Sune — This is Sune™ at top speed. Seven moves in 0.70 seconds. It's in 30 frames per second. In frame 9 more than one full turn is done! To see anything of what's going on you need to step through it. If that's too confusing, first look at the slow version.
- Slow Sune — This is the same Sune™ done slower to illustrate the finger tricks. The first three moves is a trigger, just as described above. The next two moves is also a trigger, but skipping the first move. And the final two moves are a simple column sequence.
The Zen of the Cube — the Mental Side
Being able to solve Rubik's cube very fast is a near useless skill, that takes a lot of time to acquire, and does not typically impress the opposite sex. If you think you have better things to do, I can only agree. You probably have.
Still, I think that learning to do something really well is important for anybody, and it's not too important what it is. If you have mastered one thing, it is a bit easier to master others. And doing something you're really good at is uplifting, relaxing and fun.
So if you want to strive for perfection in some field, cubing is certainly cheaper than golf!
How to practice
Of course, you need to practice speed cubing a lot to get real fast. But you also need to spend a lot of time thinking. Trying to solve in as few moves as possible, while thinking carefully about each turn. Trying to find better solutions, even though there is an easy known solution that works.
The same goes for the physical dexterity tricks (see the physical side). You need to practice seeing columns, finding trigger opportunities and other hand friendly techniques slowly before you can do it quickly.
Cube Nirvana
Strangely, for me, progress was a lot of quantum leaps. I would consistently solve the cube in about the same time, for example 80–90 seconds. Then suddenly one day I would achieve 67 seconds! And from then on I would perform in that for some weeks, until I suddenly did 52 seconds. In this manner I progressed from 3 minutes down to about 25 seconds in a series of leaps.
Those leaps were quite unexpected, and I didn't feel any better, the times just suddenly got better. I checked that my clock wasn't broken several times!
Another weird thing is that I do not think at all when cubing. I can talk freely about anything while doing world class speed. It seems like I just need to hook up my eyes and hands to some independent processor part of my brain, and it will just solve it before my eyes. It's a bit strange, but a pretty nice feeling!
Algorithm Quick Reference
Named Sequences
Step 4b sequence list
| ID | Algorithm | ID | Algorithm |
|---|---|---|---|
| a1 | R U R' | c1 | R U2 R' U' R U R' |
| a2 | R U' R' U2 R U R' | c2 | R U' R' U R U R' |
| a3 | R U2 R' U R U' R' | c3 | R' U2 R2 U R2 U R |
| a4 | R U' R' U' R U R' | c4 | R' U2 R' U R' U' R U2 R |
| a5 | R U R' U R U' R' | c5 | R2 U2 R' U' R U' R2 |
| a6 | R U R' U' R U2 R' | d1 | R2 U R2 U R2 U2 R2 |
| b1 | L F2 U F2 U' F2 L' | d2 | R U' R' U' R U2 R' |
| b2 | R U' R' U R U' R' | d3 | F' U F U F' U2 F |
| b3 | R U2 R' U2 R U R' | d4 | R2 U2 R' U' R U' R' U2 R' |
| d5 | F2 U2 F U F' U F U2 F |